3D CHARACTER ANIMATION – DEVELOPMENT LOG 4 (Keyframing & Animating)
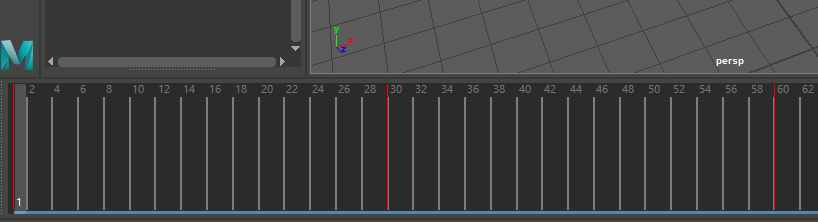
To begin keyframing my animation, I first used trial and error to determine how far apart I wanted the character’s wing flaps to be apart in order to get the most realistic movement it should have but still include some of the principles of animation. The first principle I wanted to use was anticipation as this seemed most likely to use in this situation. I had frames 0-30 go from the default ‘0’ value of the wings, to -3 being in the most upright position (difference of 3). From frames 30 to 60 I set the driven key of the wing flap from -3 to 3 being the most downright position (different of 6). Not only did this focus on the anticipation principle, but it also focused on slow in slow out, as well as arcs when the wings moved up and down
I did this to give the impression of the build-up of preparing to swing the wings down with more momentum as it would with real-life Dragons which I did some research on before keyframing the wing’s positions. At this stage, I also experimented with keyframing other parts as you can see I moved the whole body up and down as the wings flapped, to give the impression of the character flying.
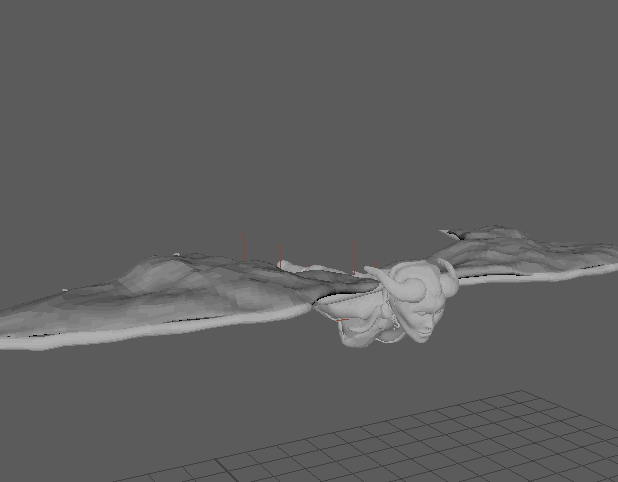
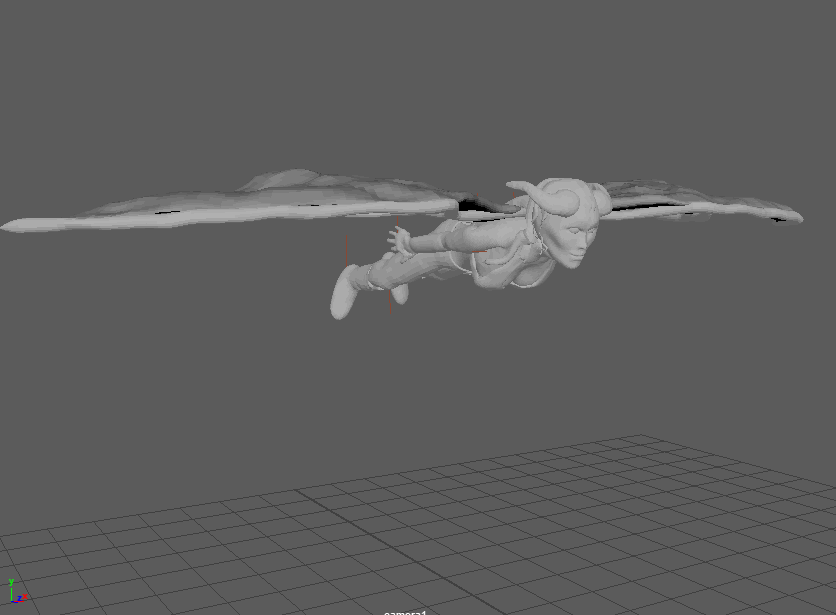
The next aspect I wanted to focus on was the secondary action animations. This is where other parts of the body are affected by the main animation (wings) giving the impression of movement and weight. In my human/dragon character, I didn’t want the legs and arms to droop too much to reduce the drag, the character would have to tuck their limbs into their body to make sure they stay flying. This slightly strays from what dragons do, which is letting their limbs drop under them. However, to give the impression of power, I bent the character’s leg before the upswing of the wings as well as tilted the head forward as the character would struggle to keep their head in place.
In this stage, I began experimenting with the basic camera movement I wanted which was to wrap around the front of the character as it swung its’ wings. I was ultimately going to change this in my preferred Rendering program of Marmoset which has its own camera animation keyframing.
However, I had a number of different issues when importing my model into Marmoset. The first was a stray piece of mesh that was invisible to Maya when I attempted to reimport the model. The next second issue I had was that the textures which I had applied in substance painter, didn’t coincide with the mesh on Marmoset, so when I textured the eyes with pupils, it didn’t work when that texture was applied to the final Render. This didn’t have too much of an effect as I could just apply textures to each part of the body since I previously split the mesh up when I first modeled the character. The final issue was that for reasons I can’t find when searching for fixes, the character wouldn’t move up and down as I had keyframed in Maya. However, an easy fix for this was to just adjust the camera position in Marmoset to make it look like the character was flying. Once I had keyframed the camera as well as the lighting to where I was happy, I then rendered it and moved on to my next animation.